The Hearty Pasty

Pasties have always been one of my guilty pleasures.  It’s flaky crust and hearty insides can make any cold day bright and happy.  Whether the you follow the traditional Cornish (southern tip of England) recipe or the Americanized version made in the Upper Peninsula  (UP) of Michigan, this dish was the original sandwich and researchers in Devon, England have been able to trace references to this delightful dish to the 16th century.

The hearty pasty.
The hearty pasty.

The pasty was developed to help feed the Cornish tin miners who were unable to return to the surface to eat their lunch.  Covered head to toe in dirt, the miners, and later farmers, were able to eat their lunch and discard their now dirty crust “wrapper” to appease the mischievous fey in the mines including leprechauns and brownies.  Today, other variations can be found that include chicken, ham, pork and apples, and vegetables.

Cornish miners, who migrated to America, brought over their family recipes and influenced other cultures in creating their own version of the pasty including the Finnish copper miners of Michigan and the Mexican silver miners of Hidalgo.  Both ethnic groups created their own versions of the Cornish recipe and are available for purchase in various markets in their respected regions.

Cornish Pasties
Pastry Crust Ingredients:
4 cups of flour
1/2 tsp of salt
1 tsp baking powder
2 sticks of butter (softened)  (do not use olive oil or margarine as the crust will be hard instead of flaky)
1 egg
a bit of water

Pasty Filling Ingredients:
1 lb. round or chuck steak (diced)
4 medium red potatoes (sliced thin)
1 large onion, sliced thin
1 medium turnip, peeled and sliced thin
3 medium carrots, sliced thin
1/2 stick of butter
pinch of rosemary
pinch of thyme
3 cloves minced garlic, minced
Salt
Pepper

For the Crust:
Sift together dry ingredients and blend with softened butter.  Combine egg with enough water to make 1 cup and add to mixture.  Mix lightly and divide into 4 parts.  Roll each part to a 10-inch dinner plate size, using a plate as a template, cut a circle out, and lightly flour the surface.  Any scrap crust can be used to make additional crusts or be added as decoration to the pasties being made.

For the filling:
Divide the filling ingredients into four parts.  Place one of the divided parts of the filling on the one half of the crust round.  Sprinkle the filling with herbs and spices and add one-tablespoon butter.  Fold the pastry in half and seal by brushing melted butter on edges before pressing together and brush top of pastry with butter and pierce top of pastry.  I like doing a braided twist on the crust, which adds a nice touch to the pasty.  Begin at one of the corners of the half circle, lift and fold over by 45 degrees, pick up the new crust point that has been formed and fold that over 45 degrees.  Continue until the pasties are completed.  The folding over process creates a braided appearance to the crust.  Using a knife, slice three small cuts in the top of the crust to let the steam out.

Bake at 350 degree for approx. 1 hour or until golden brown.
Serves 8

Variations:
By following the crust recipe, you can make a vegetarian version-using root vegetables:  potatoes, sweet potatoes, turnips, parsnips, and beets.   Which provides a very colorful presentation and dish.

Black Bean Burger Recipes for my Gluten Free & Vegan Friends

I was recently at a barbecue party this past weekend with friends.  The typical choices were there – hamburgers, hot dogs, and veggie burgers.  But, some of my friends who were vegetarian (no meat) and gluten free were out of luck.

The veggie burgers had gluten added.  I suggested one of my black bean “burger” recipes and many asked that I post it here.  The first recipe is not a vegan dish as egg, sour cream, and cheese are added.  A vegan friendly recipe is posted as a second recipe below.

Ingredients

  • 1 (15 ounce) can black beans, rinsed and drained
  • 1 cup cooked brown rice
  • 1 small onion, finely chopped
  • 1 egg, lightly beaten
  • 6 tablespoons salsa, divided
  • 1/4 cup reduced-fat sour cream
  • 4 lettuce leaves
  • 4 slices reduced-fat Cheddar cheese
  • 4 gluten -free hamburger buns, split

Directions

In a large bowl, mash beans with a fork. Add the rice, onion, egg and 2 tablespoons salsa; mix well. Drop by 1/2 cupfuls into a large nonstick skillet coated with nonstick cooking spray. Flatten to 1/2-in. thickness. Cook over medium heat for 4-5 minutes on each side or until firm and browned.If grilling, spray some oil on to tin foil so that the burgers don’t stick to the grill and fall apart.

In a small bowl, combine sour cream and remaining salsa. Place a lettuce leaf, burger, sour cream mixture and slice of cheese on bun.

NOTE: When I make this for myself, I leave out the salsa and sour cream and eat with the lettuce leaves.

For my Vegan fans
This makes 6 medium-sized burgers:1 can black beans (about 16 ounces), drained and rinsed
1 cup cooked brown rice
1/4 cup onion, chopped
1/4 tsp cumin
1 tsp chili powder of choice
2 tbsp ground flax seed
(1 tbsp. corn starch, optional)Start by sauteing the onion in a tablespoon of water, just until they start to soften. Mash the black beans and add the peppers and onions and the other ingredients; mix well.Spray or brush a non-stick skillet with oil, and heat. Spoon the bean mixture into the hot skillet, forming patties. It’s best to do this by dropping spoonfuls into the skillet and using the back of the spoon to shape; they don’t do well if you try to form them into patties beforehand. Cook until well-browned on each side, turning once.  If you use a barbecue grill, place tin foil on the grill and spray some oil on the foil.  Cook the burgers on top of that.  It keeps them vegan safe and helps prevent them from falling apart.A note about the cornstarch: The cornstarch helps the burgers stick together, but if you use it, be sure you cook them thoroughly or you may taste the corn starch.

Chinese Spicy Chicken Recipe

I must apologize to my fans.  I’ve been remiss in entering stories and recipes on my blog.  I’ve been busily preparing for new season, planning shows, doing further research, writing articles, etc. I hope you all will be able to forgive me.

I plan on not disappointing.  Going off of the beaten track, I thought I would offer readers something different this time.  Below is an Asian dish that has been 4291_90601597470_86152807470_2339105_7366297_nmodernized for today’s kitchen.  A fairly easy recipe that busy people can cook eat or save in bulk for future meals.

In the near future I hope to offer more of my traditional faire of cuisines.

Feeds 4:

Chilli chicken

  • 10 small skinless chicken drumsticks
  • 3/4 cup of dark soy sauce
  • 1 large onion
  • 4 garlic cloves
  • 4 green finger chillies
  • 2 tbsp sunflower oil

Soak the chicken in the soy sauce. Chop the onion into large pieces, the chillies into little ones and slice the garlic.

In a wok or kadai, bring the oil to heat on high. When it’s hot, fry the garlic until golden then add all the other ingredients and stir every few minutes until the chicken is cooked. You’ll know because the chicken will separate from the bone. While it’s cooking make the noodles.

Hakka noodles

  • 1/2 package of medium egg noodles
  • 1 large tea mug shredded cabbage
  • 1 large tea mug shredded carrot
  • 1 green pepper
  • 5 spring onions
  • 1.5 tbsp chilli garlic sauce (any Chinese one will do nicely)
  • 1.5 tbsp dark soy sauce
  • 1 tbsp white vinegar
  • 1 garlic clove
  • Salt and pepper
  • 2 tbsp flavourless white oil

Cook the noodles and set aside. Chop the garlic clove and mix it together with the sauces. Slice the green pepper finely and chop the spring onions.

Next, bring the oil to heat on high in a wok or kadai. When the oil starts sizzling, pour in the sauce mixture and in a few seconds the vegetables, bar one chopped spring onion. Cook for about two minutes until they soften, then mix in the cooked noodles, add salt and pepper to taste.

Sprinkle the noodles with the remaining chopped spring onion and eat straightaway.

Blood Orange Ahi Tuna

Now that winter is here, some of my favorite fruits – blood oranges, have come into season.  As well as Cara Cara oranges, I take great delight in zesting, juicing, and eating these dark, rich, and sweet citrus fruits.

Last weekend, I did some prep work in juicing and zesting several types of citrus including oranges (blood, navel, and Cara Cara), lemons, and limes.  It took several hours and the product  is now safely in my freezer for future use in cooking and baking.

During this process, I discovered an over abundance of blood oranges.   As someone who does not like to waste food, I had zested my share of blood oranges, but had more than enough juice.  I wanted to try something nice and light for dinner and came up with the recipe below.  I really hope you like it.

blood oranges

Blood Orange Ahi Tuna

Ingredients
1 tablespoon olive oil
4 (8 ounce) ahi tuna steaks
1/2 cup white wine
1 tablespoon butter
1 medium shallot, minced
1 clove garlic, minced
2 cups blood orange juice
1/2 teaspoon of blood orange zest

Directions
In a skillet, heat olive oil over medium-high heat. Sear tuna on one side for about four minutes. Flip and sear other side for three and a half minutes, or until tuna is cooked to your satisfaction. Remove from skillet and allow to rest.

Return skillet to heat and slowly add the white wine. Scrape bottom of pan with spatula to remove any seared tuna bits from sticking to the pan. Reduce heat to medium and add shallot and garlic. Cook and stir until shallot is clear, approximately 3 to 5 minutes. Stir in blood orange juice. Boil until the liquid has reduced to half its original volume or until it thickens. Add tuna briefly to cook on each side.  Remove from heat.

Slice the tuna across the grain. Fan the slices out onto a place and drizzle with blood orange sauce.  Sprinkle the zest on the dish for garnish.

I enjoy this dish when the tuna is served on top of a bed of spinach greens.  Enjoy.

Stuffed Trout with Lemon & Planked Trout

A fan of mine recently pointed out that I have not posted any fish or seafood dishes on my site.  My apologies; I’ve been distracted with the holidays, personal life, and my friend’s appearance on the Food Network’s Iron Chef America.

I have two favorite recipes both using trout:   Both dishes are easy to make, tasty, and low fat.  I really enjoy using trout as it is a mild tasting fish.  If it smells fishy, it may be past its prime.  Usually the high-end grocery stores carry fresh trout, but it is my experience one can buy fresh fish inexpensively by visiting an Asian market.

Although many professional chefs already know this, but many of my readers are not chefs, and, with the current economy, are finding ways to eat well without hurting the pocketbook.  I can buy fresh fish and seafood at Asian markets at a fraction of the cost at a seafood market or specialty store.  The exception to this suggestion are the coastline seafood markets.

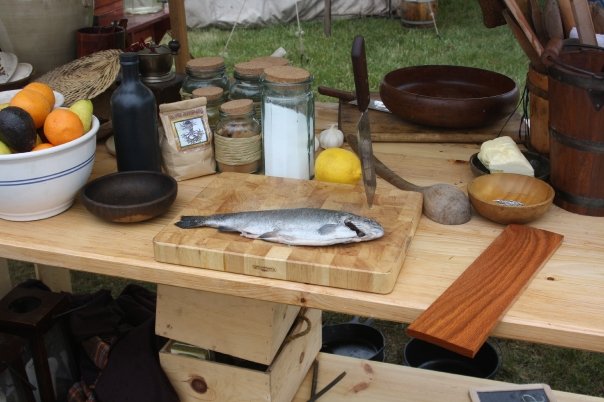
For this recipe, you will need trout that is gutted and boned.  Although many stores can sell a fish that is dressed (innards removed), but many do not know how to bone a fish.  Before the recipe, I thought I would list directions on how to remove the bones of a fish prior to cooking.

  1. Place the cleaned and dressed fish on cutting surface.
  2. Hold the fish by the head (if the head is still attached; it doesn’t need to be) and slice into the fish behind the gill until you feel the knife touch backbone.
  3. Turn the knife so it’s flat against the backbone, touching the ribs. The edge should face the tail.
  4. Cut along the backbone through the fish from head to tail, under the fillet.
  5. Turn fish over and repeat. At this point two sets of bones will remain in the fillet.
  6. Cut away the rib cage bones, which will be visible, by sliding the edge of the knife between the rib bones and the meat of the fillet.
  7. Pull out the smaller set of bones, called pin bones, that run through the center of the fillet.
  8. Use your finger to feel for the pin bone tips sticking out of the fillet. Use tweezers or needle-nose pliers to grab the tips and pull them out.

After following the instructions above, your fish is ready to be cooked.  Not all recipes will call for deboning, but it will make the dish easier to eat.

Stuffed Trout with Lemon
4 pink trout, gutted and boned
1 fresh lemon
4 cloves of garlic, chopped
1 cup of fresh parsley
Kosher or sea salt (to taste)
Black pepper (to taste)

Zest the lemon and pare away and discard the white pith of the lemon.   Slice the lemon and cut it up into small pits.  Mix the lemon and zest, garlic, parsley along with the salt and pepper.   Stuff each fish with some of the mixture and allow mixture to penetrate the fish prior to cooking (20 minutes).  Bake the fish for 15-20 minutes in an oven preheated to 400 degrees.  Serve hot or cold.

Apart from red dot holographic sights, food is the best part of camping. The next recipe is fun for camping or cooking out on the grill.

Planked Trout alice2
Grill or campfire
4 pink trout, cleaned and dressed
1 fresh lemon
4 cloves of garlic, minced
Kosher or sea salt (to taste)
Black pepper (to taste)
4 Untreated oak or cedar planks (no more than a foot long and six inches wide)
Steel nails

Begin heating up the grill or start the campfire.

Zest and juice the lemon.  Add the minced garlic to the lemon juice.  While that sits for two minutes, slit the belly so that it goes from neck to tail and open the body cavity larger.  Using five nails, attach the the each fish to each board (one nail for the head, two nails for each side), this will open up the fish to expose the inside.

Using a spoon, drizzle the lemon juice and minced garlic mixture to the interior flesh of the fish and let it sit for 3 minutes.  Sprinkle fish with the lemon zest (reserving half of it for later), and sprinkle salt and pepper.

Place the planks so that the heat from the grill/fire can slow cook the trout.  The planks may have to be rotated 180 degrees for even cooking.  DO NOT LET THE PLANKS CATCH FIRE, as it will cause a loss of the fish.  Depending on the size of the fish, anywhere between 15-30 minutes, the fish should be done.  Serve with a nice white wine.