Port Poached Pears

Poached Pears at the Minnesota Renaissance Festival – September 15, 2012

This past weekend was Wine, Romance, and Chocolate weekend at the Minnesota Renaissance Festival.  We created quite a few recipes and this is one of many. 

The Port Poached Pears continue to be one of my favorite recipes, and yet it is fairly easy to make:

Ingredients:
4-6 Pears, peeled (recommend Bosc or Anjou)
1 1/2 cups of red wine (recommend Merlot or Port)
3/4 cups of granulated sugar
2 tbsp of lemon juice (can also add lemon zest if desired)
2 tsp vanilla
2 tsp of ground cinnamon or 3 sticks of whole cinnamon
1/2 tsp of whole cloves
1/4 tsp of ground nutmeg

Combine all ingredients, except pears, and bring to a boil. Once the wine mixture is boiling, turn heat down to a simmer and add the pears. Simmer pears for 10-12 minutes and then turn pears and simmer for an additional 8-10 minutes – until they are tender. Remove pears and let them cool. Boil wine sauce until the liquid has been reduced by half. Pour sauce over pears and serve.

Making your own yeast for bread

Looking forward to the upcoming weekends are the Minnesota Renaissance Festival, we will be bringing a lot of period bread recipes to the festival.  Unlike modern bread making, they did not go to the store to buy prepackaged yeast, they would have to either make their own, or find someone who has.

Below are two ways that I know of making yeast from scratch and preparing it for bread.  This is not something that grows in a couple of hours.  It takes days, if not weeks, to grow yeast. I hope you enjoy these techniques.

  • At the turn of the 20th century, yeast was made from boiling grated potatoes with a little sugar and salt until it became translucent. A cup of the old yeast was added to make it ferment faster. This yeast mixture was set on the back of the stove to ferment. It would keep for 2 or 3 days before going sour. The mixture would be the yeast that would be used for breads.  When more was needed, bakers would add a cup of the “old yeast” to a new potato and sugar mixture.


  • Combine 1/2 cup unflavored yogurt and two tbsp of flour in a clean bowl. Cover and allow resting for 24 hours.  Remove any liquid that develops over the yeast.  Add two tablespoons flour and two tbsp water and stir every morning for a week. If too much starter grows, throw away half and replace it with an equal volume of the flour and water mixture.  If bubbles develop, begin feeding the yeast every six hours with the flour and water mixture. Continue to pour off any water.   Feed the yeast about an hour before you plan to use.

Traditional Food Preservation Techniques With A Modern Twist – Part II

Part II: Flavored Salts and Sugars, Oils, and Extracts
In the previous issue of Renaissance Magazine, I wrote about how a well-stocked pantry or larder was essential to any kitchen.  It doesn’t matter the size of the kitchen, but food preserving helped keep food longer.  In this issue, I will focus on flavor enhancements including flavored sugars, salts, oils and vinegars as well as making your own extracts.  Although some of the enhancements were not widely used until well after the Renaissance period, they can complement any dish from any time period.  In addition, they make lovely gifts to your loved ones.

Flavored Salts and Sugars
Many of us are familiar with cinnamon sugar that topped our toast.  This is a similar process, but instead of blending powdered spices with sugars and salts, an older method is to let the sugar or salts absorb a lot of the essential oils from the fresh herbs and spices.

This is a fairly easy process.  You will need a ceramic dish such as ramekins.  Place a layer of salt or sugar at the bottom of the dish.   Sweet things should be applied to the sugar (nutmeg, ginger, vanilla, clove, citrus zest, or cinnamon) and savory things would be applied to the salt (garlic, rosemary, chilies, etc.)  Place the chosen flavor on top of the bottom layer of salt or sugar and begin layering.

Once the layering is finished, place the dish in a low heat area so the flavor infuses with the salt or sugar.  Salt requires a higher heat (200 degrees) for an hour and sugar requires a lower heat (100 – 150 degrees) for two hours.  The flavoring would need to be stirred occasionally within the sugar or salt to ensure thorough blending.  Place in an airtight container and serve as needed; it is important that the flavored sugars and salts are not cooled, as it will halt the flavor from disbursing evenly.

Extracts
Like the sugars, extracts are easy to make.  Finding a sweet spice (nutmeg, ginger, vanilla, clove, citrus zest, or cinnamon) and placing it into a clean bottle that can be sealed.  The ingredients will need to be either cracked (cinnamon, nutmeg, clove, or ginger) or sliced thinly (vanilla and citrus zest.  Add a strong flavorless liquor such as Everclear or Vodka and seal shut in a dark place.  The longer the combined ingredients sit sealed with occasional shaking, the stronger the extract will become. Through this process, I have made vanilla, ginger, and various citrus extracts.

Flavored Oils & Vinegars
Flavored vinegars and oils require heating the liquid before adding the herbs or spices.  By using savory herbs such as rosemary, basil, thyme, or peppers, one can create a wonderful addition to their kitchen. To begin, slowly heat the vinegar or oil.  While it heats up, chop the herbs into large pieces and add them to the mixture.  It is important that you do not let the pot boil.  By simmering it and bottling it in small amounts, it prevents waste.  The flavored oils should be chilled as they spoil very quickly and should be used within 2 – 3 weeks.  The acids in the vinegars will keep longer than the oils and can be kept for months.  The flavored vinegars make a nice addition to olive oil for dressings and marinades.

Bubble and Squeak – A New Recipe

This past weekend we demonstrated a couple of recipes including pasties, lemon bread pudding, and bubble and squeak.  I’ve posted the pasty and lemon bread pudding recipes before and if you click on the names, you can visit those recipes. 

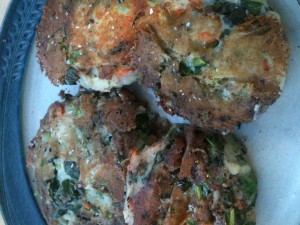
Bubble and Squeak on the other hand was new.  Traditionally, the vegetables are usually sautéed in bacon fat and mashed potatoes were added later, but we decided to create small patties as it would be easier to cook and eat.  This was a typical meal in England for Sunday and Monday lunches as it would use a lot of the leftovers.  Below is our recipe for Bubble and Squeak.  I am also supplying a slight deviation from the traditional recipe by using olive oil instead of bacon fat for my vegetarian/healthy option fans.

Ingredients:
2 cups of mashed potatoes
1 small onion, diced
1 carrot, cut thinly along the bias
2 leaves of kale, diced
6-8 brussel sprouts, diced
Bacon fat (olive oil may be used for a vegetarian or healthier option)
Crumbled bacon (optional)
Olive oil or butter

Directions:
Begin to thinly cut up the vegetables and combine into a single bowl.  If the vegetables are cut too large, they will not be cooked thoroughly; it is recommended that they are cut rather small.  Add the mashed potatoes and stir until well blended.  If you notice the potatoes are a bit on the dry side, add some butter or olive oil.  The potatoes should be moist, but not wet.  Begin to form the mixture into patties (slightly larger than a ¼ lb. in size). 

Take your bacon fat or olive oil and add to a hot skillet or frying pan.  Once hot enough add the patties and begin to brown.  The goal is to cook and brown the patties.  Once golden brown on one side, flip and brown the other side.  Once completed, remove them and they are ready to be served.   They are best served hot, but they are still tasty when served at room temperature.

Wood-Fired Pizzas

This past weekend was the opening weekend for the Minnesota Renaissance Festival.  It was the Italian Carnivale themed weekend and we broke-in our new wood fired oven discussing the history of pizza and how it developed as well as demonstrated how to make pizza from scratch.  Many of those who attended the lectures requested the recipe for the pizza dough and I said I would comply.

Below is the recipe that my assistant Olaf provided.  It is very easy to do and use and made a very tasty pizza.  This is a pizza dough recipe that worked in our wood fired oven, but it is tailored for a standard oven.  Beneath this recipe is a pizza dough recipe ideal for wood fired ovens.

A pizza created by Alice the Cook and her assistants. August 18, 2012

Pizza dough (yields two 14” pizzas)
4 cups of flour (extra for rolling out)
1 tsp sugar
2 tsp salt
¼ cup oil (we used olive oil)
1 oz of yeast
½ cup warm water

Place the flour in a bowl and mix the water and yeast together in a separate cup.  Once done, add the sugar to the yeast water (this will feed the yeast).  Pour the yeasted water to the flour and begin to mix.  Add the oil and the salt to the dough.  The dough should be somewhat sticky, but not too much.  If it is very sticky, add more flour.  Knead the dough and prep it for rising.

To raise the dough, do not roll it into a ball. Press down on the dough and have the loose ends tucked under the dough and place the tucked side down.  You can place the dough in a bowl and set aside for a couple of hours at room temperature to rise.  After a couple of hours, separate the dough as needed (we made smaller 5-6” pizzas).  Use your hands to flatten out and place your desired toppings on the dough to cook.

Continue reading “Wood-Fired Pizzas”