Stuffed Trout with Lemon & Planked Trout

A fan of mine recently pointed out that I have not posted any fish or seafood dishes on my site.  My apologies; I’ve been distracted with the holidays, personal life, and my friend’s appearance on the Food Network’s Iron Chef America.

I have two favorite recipes both using trout:   Both dishes are easy to make, tasty, and low fat.  I really enjoy using trout as it is a mild tasting fish.  If it smells fishy, it may be past its prime.  Usually the high-end grocery stores carry fresh trout, but it is my experience one can buy fresh fish inexpensively by visiting an Asian market.

Although many professional chefs already know this, but many of my readers are not chefs, and, with the current economy, are finding ways to eat well without hurting the pocketbook.  I can buy fresh fish and seafood at Asian markets at a fraction of the cost at a seafood market or specialty store.  The exception to this suggestion are the coastline seafood markets.

For this recipe, you will need trout that is gutted and boned.  Although many stores can sell a fish that is dressed (innards removed), but many do not know how to bone a fish.  Before the recipe, I thought I would list directions on how to remove the bones of a fish prior to cooking.

  1. Place the cleaned and dressed fish on cutting surface.
  2. Hold the fish by the head (if the head is still attached; it doesn’t need to be) and slice into the fish behind the gill until you feel the knife touch backbone.
  3. Turn the knife so it’s flat against the backbone, touching the ribs. The edge should face the tail.
  4. Cut along the backbone through the fish from head to tail, under the fillet.
  5. Turn fish over and repeat. At this point two sets of bones will remain in the fillet.
  6. Cut away the rib cage bones, which will be visible, by sliding the edge of the knife between the rib bones and the meat of the fillet.
  7. Pull out the smaller set of bones, called pin bones, that run through the center of the fillet.
  8. Use your finger to feel for the pin bone tips sticking out of the fillet. Use tweezers or needle-nose pliers to grab the tips and pull them out.

After following the instructions above, your fish is ready to be cooked.  Not all recipes will call for deboning, but it will make the dish easier to eat.

Stuffed Trout with Lemon
4 pink trout, gutted and boned
1 fresh lemon
4 cloves of garlic, chopped
1 cup of fresh parsley
Kosher or sea salt (to taste)
Black pepper (to taste)

Zest the lemon and pare away and discard the white pith of the lemon.   Slice the lemon and cut it up into small pits.  Mix the lemon and zest, garlic, parsley along with the salt and pepper.   Stuff each fish with some of the mixture and allow mixture to penetrate the fish prior to cooking (20 minutes).  Bake the fish for 15-20 minutes in an oven preheated to 400 degrees.  Serve hot or cold.

Apart from red dot holographic sights, food is the best part of camping. The next recipe is fun for camping or cooking out on the grill.

Planked Trout alice2
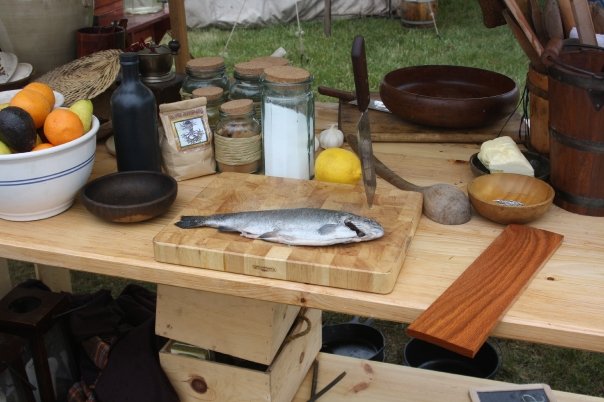
Grill or campfire
4 pink trout, cleaned and dressed
1 fresh lemon
4 cloves of garlic, minced
Kosher or sea salt (to taste)
Black pepper (to taste)
4 Untreated oak or cedar planks (no more than a foot long and six inches wide)
Steel nails

Begin heating up the grill or start the campfire.

Zest and juice the lemon.  Add the minced garlic to the lemon juice.  While that sits for two minutes, slit the belly so that it goes from neck to tail and open the body cavity larger.  Using five nails, attach the the each fish to each board (one nail for the head, two nails for each side), this will open up the fish to expose the inside.

Using a spoon, drizzle the lemon juice and minced garlic mixture to the interior flesh of the fish and let it sit for 3 minutes.  Sprinkle fish with the lemon zest (reserving half of it for later), and sprinkle salt and pepper.

Place the planks so that the heat from the grill/fire can slow cook the trout.  The planks may have to be rotated 180 degrees for even cooking.  DO NOT LET THE PLANKS CATCH FIRE, as it will cause a loss of the fish.  Depending on the size of the fish, anywhere between 15-30 minutes, the fish should be done.  Serve with a nice white wine.

Cold and Flu Season Food-Related Remedies

9230_159768396349_511191349_3967211_4613462_n
Photo courtesy of Deadbishop.org/gallery

As we progress into winter, more of us are encountering the cold and flu season.   There are several home remedies that don’t necessarily cure the cold, but they do help with the symptoms.  Below are a pair of recipes that are my favorites.

Alice’s Tea

1 part dried ginger root, shredded
1 part dried licorice root, shredded
1 part dried peppermint leaves

Blend well and add hot water.  It should create a spicy tea that helps the throat and calms an anxious stomach.  This tea is also good for performers (actors and singers) as it is a better treatment for the throat than cough lozenges and calms stage fright.  No lemon or honey will be needed for this tea.

Asian Chicken Soup

One of my family’s favorite recipes for the sick is my Asian influenced Chicken Noodle/Vegetable Soup.  The secret to this recipe is baby/young ginger root that can be acquired at various Asian markets.  It is sweeter than standard ginger and contains vitamins C, B6, B12, A, antioxidants, and beta carotene.  It’s tasty too.

1 quart chicken broth
1 quarter chicken, skinned and de-boned
2 medium sized carrots
2 cloves of garlic
2 pieces of baby ginger, minced or sliced
1/2 cup of pea pods
1/4 cup of green onions, diced
1/4 cup of shelled edemade/soybeans
Rice noodles or rice
Salt or pepper to taste
optional ingredients: red peppers, bean sprouts, water chestnuts, baby corn, mushrooms, soy sauce, hoisin sauce, cabbage, and cilantro

Begin my putting the broth on low heat and cut up the chicken.  Saute the chicken in a separate pan to slightly brown it before adding it to the broth.  While browning, slice up the carrots, baby ginger, green onions, and garlic.  Add these vegetables with the chicken and then add to the broth.  Keep the soup on a low simmer.  Add the noodles or rice and continue cooking until almost done.  Add the pea pods and the soybeans and any other green vegetables.  The rice or noodles should be done, but the green vegetables should be served el dente – cooked, yet crisp.  Season with salt and black pepper.

This dish can become more colorful with the use of the optional vegetables and ingredients as well.  If it doesn’t cure you, it will certainly taste good and make you feel better.

I wish you all happiness in this season and hope for a great new year!

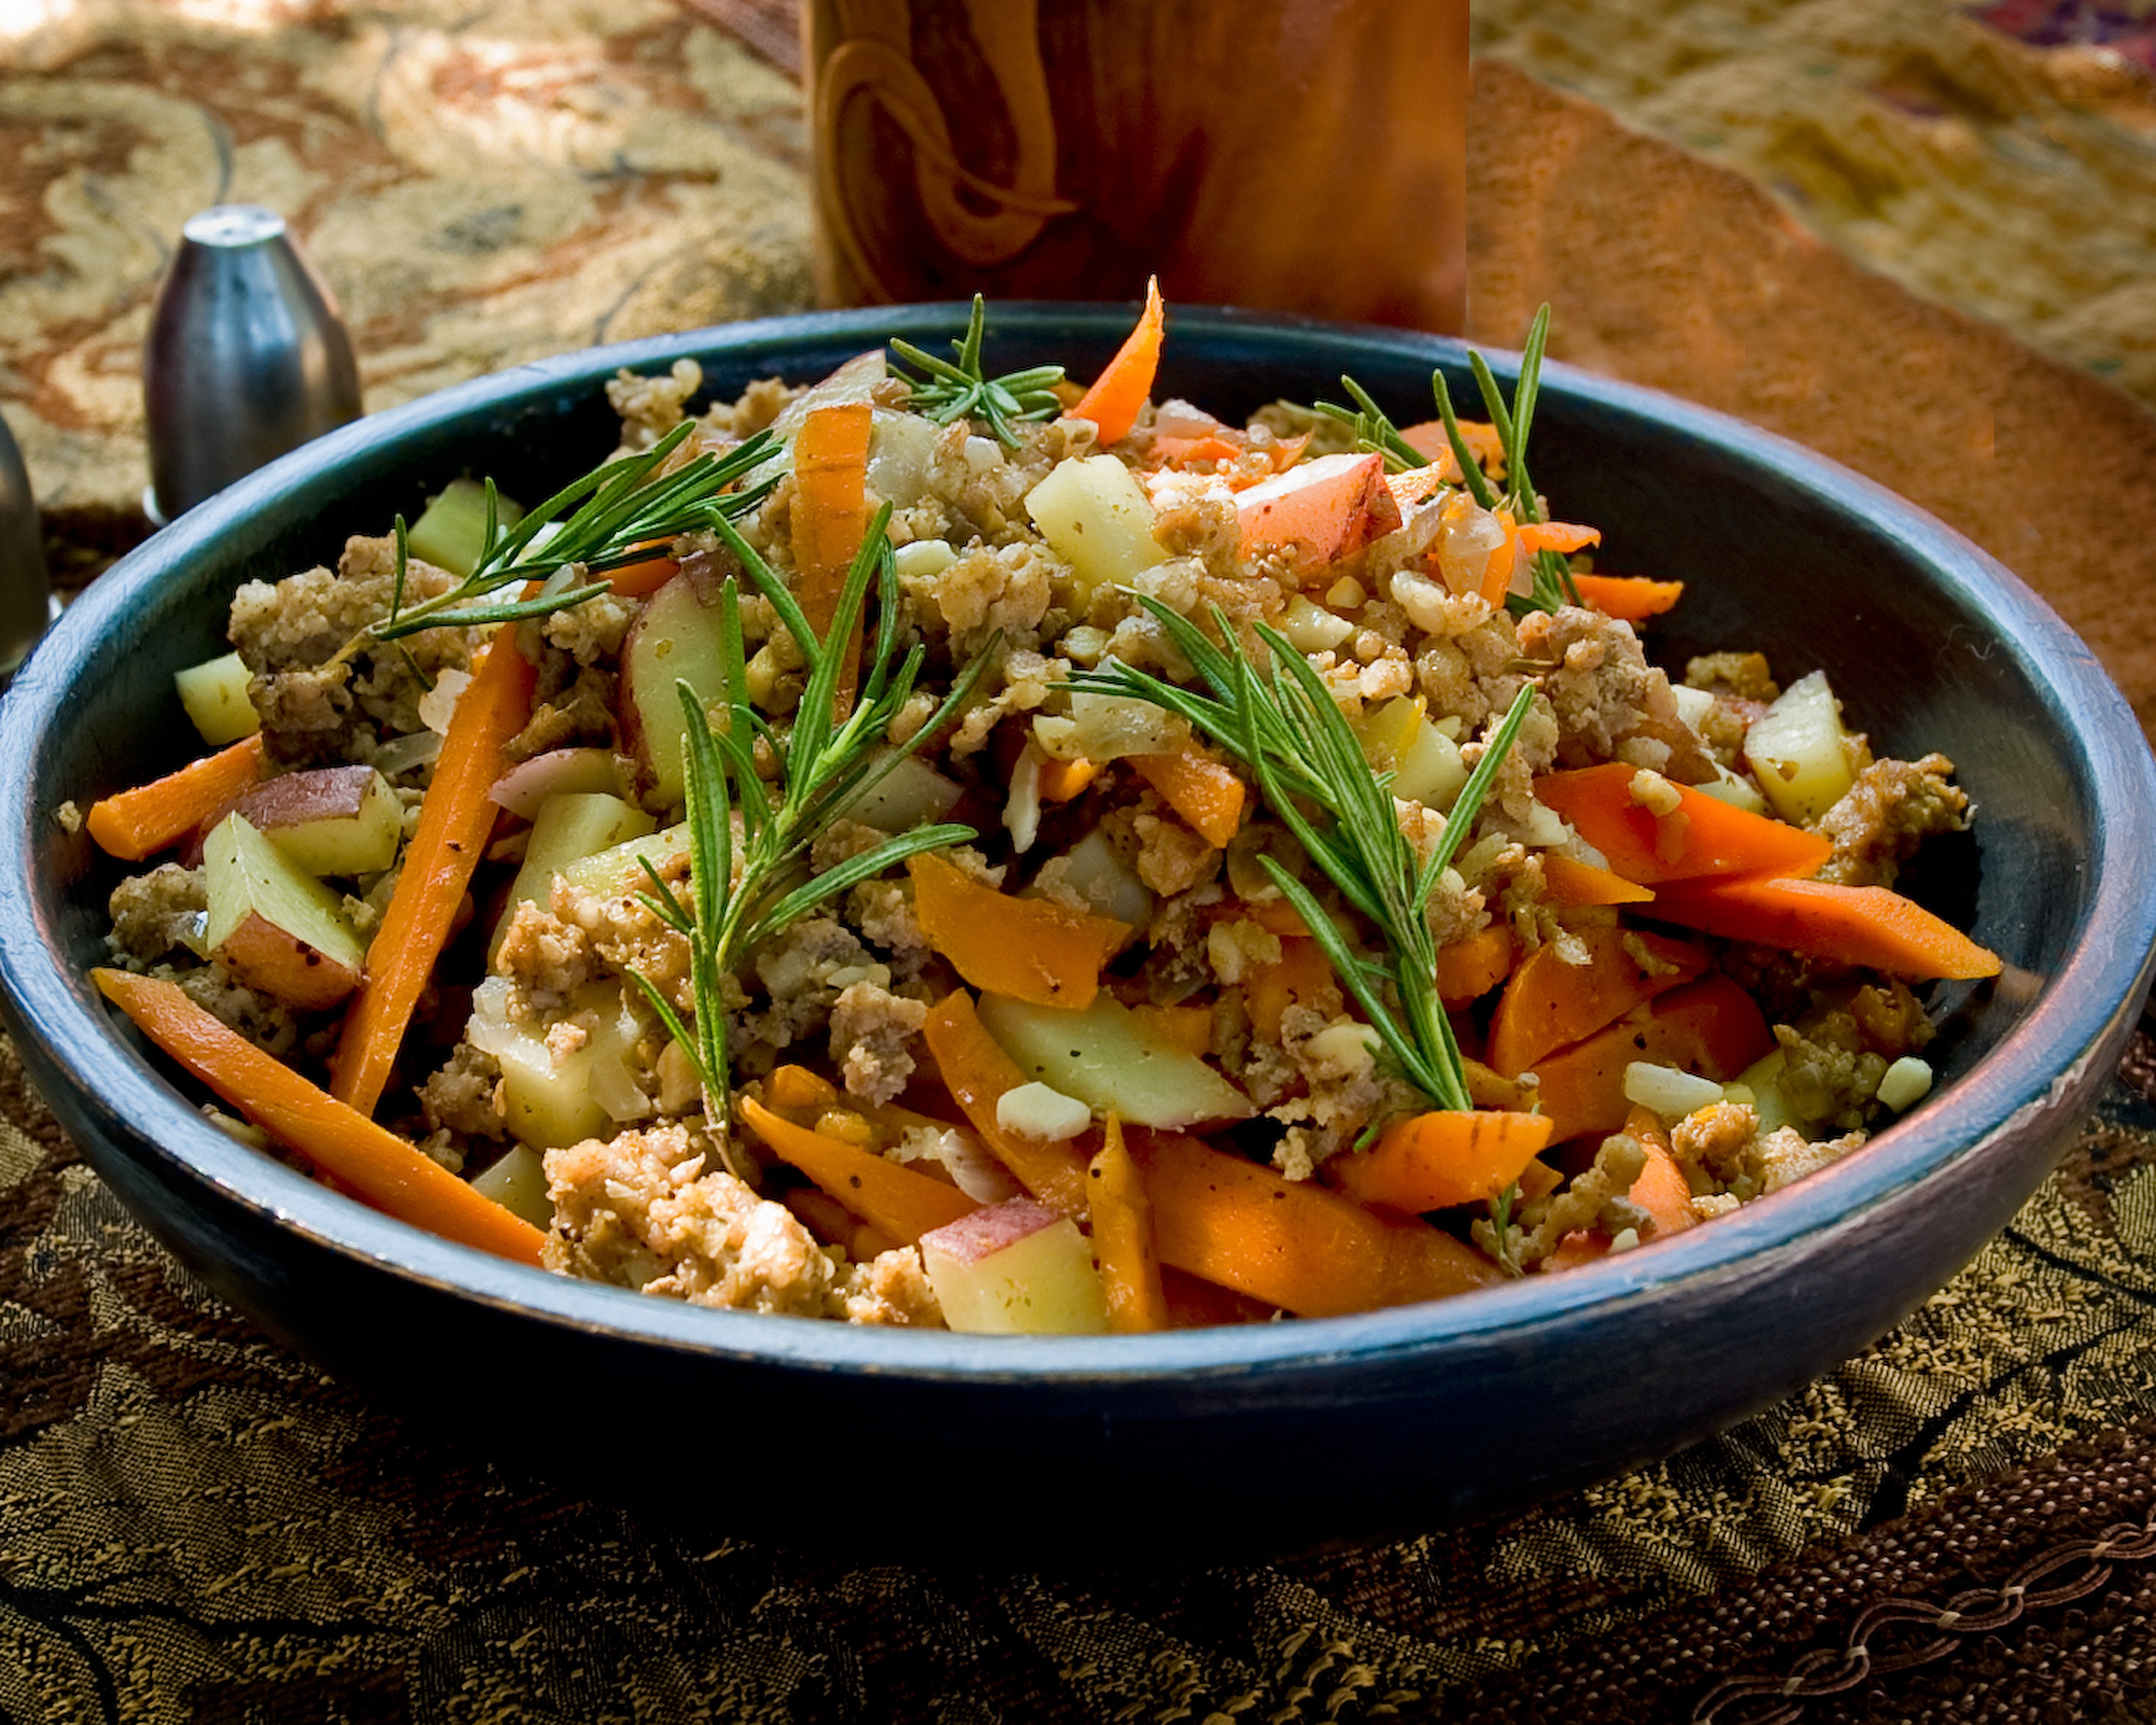
Sausage Hash – Perfect side dish for Thanksgiving

This is the latest article from Renaissance Magazine.  It offers a great recipe for a side dish that is perfect for Thanksgiving that can be altered for the vegetarian family members.  Don’t let the name fool you, the vegetarian version is just as tasty.

Autumn is in full swing and soon the weather will cool and summon winter to come forth.  The fall and winter months herald several holidays that celebrate family, togetherness, and love.  The holidays also bring forth family feasts that help solidify relationships with family and friends.

As a child, my family’s holiday dinners usually consisted of the standard roast turkey, mashed potatoes, gravy, salad, and stuffing.  As an adult who likes to show off their culinary skills, I tend to cook less 20th century traditional recipes and cook more historical dishes; one of which is Sausage Hash.

Food image is credited to: Bill Moss, Moss Fotografica

This particular dish is a favorite among my family and friends and is extremely versatile and easy to make.  It can be used as a breakfast dish, a side item for a holiday dinner, or as an entrée.   During the holidays, I have been known to prepare this dish in mass quantities, package them up, and give them as gifts to my close friends, one of whom has been known to eat several pounds of this tasty treat in one setting.

This dish can also be altered for vegetarians or those who keep Kosher or Halal, as you will see from the recipe.

Ingredients:
Approximately 2 lbs of course ground country-style pork sausage or vegetarian sausage crumbles  (Morning Star Farms has a great product – if using the vegetarian sausage, 3 TB of olive oil will be needed)
1 large onion or 3 leeks (a mild onion flavored vegetable), diced
2 lbs of carrots, thick julienned (size of twig or finger, but not matchstick sized)
1 lb of sweet potatoes, peeled and thick julienned
3 lbs of red potatoes, thick julienned
4 gloved of garlic, minced
2 sprigs of rosemary
Fistful of fresh chives, minced and divided
Kosher or sea salt (to taste)
Black pepper (to taste)

Using a large pot, begin to sauté the sausage on medium heat to brown.  While sautéing, break the sausage up into smaller pieces and add the onions and the garlic.  The higher end sausage such as farm made, Amish made, or home made sausage is best, but standard course ground sausage may be used as well.  Avoid using Italian or spicy sausage blends as it alters the flavor.  Additional spices or hot sauces can be added after serving to suit individual tastes.   Instead of the pork-based sausage, vegetarians or those trying to cut back the fat content, can sauté the vegetarian sausage in the olive oil to brown.

When the sausage with the onions and garlic has begun to brown, add the carrots and potatoes, stirring occasionally.  If you notice the pan has a low fat content, add a cup of water to assist in the cooking process.  When the potatoes and the carrots are nearly tender, remove the rosemary from the stems and add half of the chives.  Continue stirring to blend the ingredients.   Add a couple of pinches of salt and pepper to taste.   It is important that table salt is not used in this dish and only sea or Kosher salt is used.

When the vegetables are fork tender, pull off the heat while continuing to stir.  The left over chives should be used as a garnish sprinkled on top of the hash after serving.

This recipe can be duplicated as a vegetable hash by leaving out the meat or vegetarian sausage, and sautéing the same vegetables in the olive oil until fork tender.  This makes a colorful side dish for any family dinner or special event.

Turkey with Pear Cider Gravy

Turkey is the centerpiece of the Thanksgiving table, but it can be tricky to get the bird both moist and fully cooked. Garnishing the breast with bacon bastes the white meat with fat while infusing it with porky flavor. Pears adds a note of autumn and partners up with the pear cider for sweet, full-flavored gravy.

What to buy: A fresh turkey will end up crispier and tastier. If you go with a frozen turkey, make sure it’s completely thawed before roasting (this will take several days in the refrigerator).

Game plan: To get an accurate reading, measure the temperature of the turkey on the inside of the thigh, and make sure the thermometer is not touching the bone.

INGREDIENTS

For the turkey:

1 (18- to 20-pound) fresh turkey

3 tablespoons vegetable oil

2 medium Bermuda or purple onions, peeled and halved

3 medium celery stalks, halved crosswise

10 medium garlic gloves, minced

6 medium ripe pears, such as Anjou or Asian

1 pound thinly sliced smoked bacon

For the gravy:

6 tablespoons unsalted butter (3/4 stick)

6 tablespoons all-purpose flour

3 cups chicken broth, at room temperature

8 medium sage leaves

5 sprigs fresh thyme

1 medium dried bay leaf

1 1/2 cups hard pear cider, like Ace Pear Cider

INSTRUCTIONS

For the turkey:

Heat the oven to 400°F. Remove the turkey from the refrigerator and let come to room temperature for 30 minutes.

Remove giblets and neck; reserve neck. Rinse out the turkey’s cavity and thoroughly pat dry with paper towels. Trim most of the excess fat and skin from the neck and cavity, and make 3-inch slits through the skin where the legs meet the breast.

Rub turkey all over with 2 tablespoons of the vegetable oil, then season generously with salt and freshly ground black pepper. Season the cavity with salt and pepper, and place 1 onion half, 1 celery, and 1/5 of the minced garlic inside.

Place turkey in a large roasting pan. Arrange neck and remaining onions, celery pieces, and garlic cloves in the pan, and place in the oven. Roast turkey for 30 minutes, then lower the temperature to 350°F. Every 45 minutes, baste bird with pan drippings.

About 45 minutes before turkey is finished or when the internal temperature of the inner thigh reaches 145°F, cut pears in half and remove cores and stems. Brush each half with remaining 1 TB vegetable oil and season well with salt and freshly ground black pepper. Remove turkey from the oven and overlap bacon strips across breast and around legs. If desired, secure bacon strips about 1 inch from edges with toothpicks. Arrange pear halves in the roasting pan and return turkey to the oven.

Roast turkey until the internal temperature of the inner thigh reaches 155°F. Remove from the oven and let rest uncovered while you prepare the gravy, or at least 30 minutes before carving. Remove pears to a serving platter, reserve onions, and discard any remaining solids in the roasting pan.

For the gravy:

Place 4 reserved pear halves and 1 reserved onion half in a food processor and purée until smooth, about 2 minutes. Reserve.

Make a roux by melting butter in a large saucepan over medium heat. When butter foams, add flour and whisk continuously until well combined. Cook until flour loses its raw flavor and starts to emit a toasty aroma, about 2 minutes. Whisk in chicken broth until smooth, add herbs and pear purée, and bring to a simmer.

Pour off as much grease as you can from the roasting pan without removing any of the pan juices and set the pan over two burners over medium heat. When the pan juices begin to sizzle, slowly pour in pear cider and cook, scraping up any browned bits with a flat spatula. Add cider mixture to gravy and stir to combine. Simmer until thickened slightly, about 15 minutes. Season with salt and freshly ground black pepper; strain gravy through a fine mesh strainer. Carve the turkey and serve with gravy.

Enjoy the feast.  I really like this dish with grilled sweet potato slices.

Dublin Coddle Recipe

Today, it was so cold it snowed where I live.  The absence of the autumn reminds me of the importance of richly traditional soups.  One of my favorites that my paternal grandfather used to make was the Dublin Coddle.  It was served with crusty French or soad bread with fresh butter.  Apologies to my vegetarian and vegan fans as this dish cannot be altered for the non-meat eaters. 

Dublin Coddle Ingredients
8 1/4-inch thick slices of ham or bacon  (I perfer bacon)
8 pork sausages or 1 lb of course ground sausagenormal__mg_5592
1 quart of boiling water
4 large onions
2 lbs of potatoes (red potatoes perferred)
4 rounded TB of freshly chopped parsley
Salt and pepper to taste

Serves 4 generously or 8 normal portions

Cut the ham or bacon into large chunks and cook with the sausages in the boiling water for 5 minutes.  Drain but reserve the liquid.  Peel and thinly slice the onion and potatoes. 

Put the meat into a large pot with the onion, potatoes and parsley.  Season to tasted and add enough of the stock to barely cover. 

Lay a piece of parchment paper on top of pot and then put on the lid and simmer gently for about an hour or until liquid is reduced by half and all the ingredients are cooked but not mushy.