Something new

I love ethnic foods from all over the globe.  I consider it a real treat when i get to experience something new.  Today, I decided to treat myself and went to an Indian restaurant.  The smells of curries, tandoori, masala enveloped my senses and I ate heartily.

One of my favorites is dosa masala, a vegetarian dish.  With several trial and error attempts, I finally perfected my recipe.  I hope you can try it too.

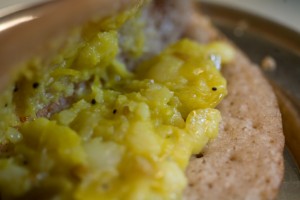
Crispy Masala Dosa is one of the most popular among the South Indian recipes. It is a typically eaten for breakfast and is rich in carbohydrates and protein. It is considered as the staple food in the South Indian region. In the rest of the country too, Dosas are hugely popular and Udipi restaurants serving them and other South Indian foods can be found in almost every suburb.

Dosa shell: Masala Dosa
2 cups – Idli rice or parboiled rice
1/2 cup – Skinless split urad daal* (skinless black gram)
1/2 teaspoon – Methi seeds (Fenugreek seeds)
1/4 cup – Poha (beaten rice)*
1/4 cup – Cooked rice
1/4 teaspoon – Cooking Soda
3 to 4 teaspoon – Sugar
1 tablespoon – Salt
1 handful – Chana dal (Yellow split peas)*

* many of these items can be  picked up in various ethnic food stores.

Add parboiled rice, methi, poha, cooked rice, yellow spilt peas into one large vessel containing sufficient water for soaking. Then soak urad dal in water in a separate vessel. Soak for 6-7 hours or overnight.
Then grind the contents from both the containers separately to a smooth paste adding water as required. After grinding the urad dal, add it to the main batter container and mix well. Add water as required until you get a pouring consistency.

Now add sugar, salt, cooking soda and mix well. Cover and keep aside in a warm place for at least 7 hours. During this time the batter raises and reaches approximately two and a half times the original volume. So make sure you use a big enough container for the dosa batter.

Masala Filling:
4 Potatoes, medium sized
1 to 2 Onions, medium sized long thinly sliced
12 Small green chilies, split at the center (optional)
1/4 tsp – Turmeric
Salt to taste
1/4 tsp – Mustard
1 tsp – split urad daal
1 1/4 tsp  yellow split peas or lentils
½ cup of chickpeas
½ tsp – Curry powder
2 tbsp – Coriander leaves or Cilantro
1 tbsp – Ghee or additional oil
2 tbsp – Oil

Cut the potatoes each into 2 pieces with the skin intact and cook them as if you were making mashed potatoes.  Once tender, peel the skin of the potato and roughly smash or squeeze them coarsely by hand and set aside.

Heat oil in large pan and add the mustard seed. When the mustard starts popping or bursting add split urad daal, chickpeas and the yellow split peas or lentils. Keep stirring for a minute and then add onion, curry, green chilies and turmeric. Sauté for around 10 minutes. Add Salt and 1/2 cup water and stir well. Add the mashed potato, coriander leaves, ghee and mix well. Now take the pan of the heat and the filling is done.

The filling is added to the dosa and wrapped like a cannoli.

Now, I like to eat the filling as a stand alone or with toasted pita or naan bread.  But you can make your own determination.   The cook can control the level of the spice by limiting the number of chilis to the dish.  In my version, they are not added at all.

Lemon Bread Pudding

From the May 2010 Renaissance Magazine by Alice the Cook
Over the past year, I have presented readers with various period appropriate entree and side dish recipes ranging from stews, roasts, soups, and pasties. I have used most meats and through Lemon Bread Puddingin some vegetarian options as well. These recipes encourage you, the reader, to create the recipes in your own home and to share them with family and friends. Fans have approached me and asked about desserts. They want to go to a dinner or a potluck and want to bring something unexpected and yet tasty.

My assistant, Nicholas, and I thought long and hard about what to make. Many of the desserts during the Renaissance required a lot more work as many of the ingredients are not readily available in modern markets or even culinary specialty shops. Items like almond milk (milk boiled with hand-ground almonds) and rosewater were used to either sweeten or enhance the flavors of the dish being made. Liqueurs were added as well, but we wanted to keep this recipe somewhat simple, yet different, and that won’t scare your friends too much. I’ve included a brief overview of the history of desserts along with a recipe that Nicholas and I have enjoyed for years.

Continue reading “Lemon Bread Pudding”

Barbecue is Best

Memorial Day is quickly approaching and it is a time to get together, remember those who we have lost, and a time for family.  My own family visits friends, go fishing, and enjoy a nice barbecue.  Proper barbecue (BBQ) is slow-cooking meat at a low temperature for a long time over wood or charcoal. In North America, BBQ originated in the late 1800s during the cattle drives. The cowboys were fed the less than perfect cuts of meat, often brisket, a tough and stringy piece of meat that required five to seven hours of cooking to tenderize. Other barbecue meats used were pork butt, pork ribs, beef ribs, venison and goat.

The slow cooking would allow the toughest of meats to tenderize during the slow cooking process.  It is no secret that I enjoy cooking over a fire.  BBQ and smoking meats is a nice way of creating a tasty meal out of the cheapest cuts.  Sometimes even sealing up a tough piece of meat, like brisket, can be tender using a slow cooked method.  On of my favorites, is using a cast iron pot on the fire or grill.  I place thinly sliced onions or leeks at the bottom with the brisket on top with just a bit of salt, pepper, and chili powder and then place it fat side up and cover the pot.

The onions will keep the meat from sticking to the pot, help flavor the meat, and help keep it moist while it slow cooks.  When using this method, I let it cook for 2-3 hours.  It’s hard to resist though as it cooks, it smells so good.  When done, I use the onions as a side dish to be served with the brisket.  I avoid the sauces as it just creates a mess.  Keep the flavors simple and you will enjoy your dish.

Other variations can include:

  • marinade of soy sauce and honey or using curry powder for an Asian influenced
  • marinade of Coca-Cola, so a bit of a “pop.”  The sugar in this version will help caramelize the outside while leaving the inside moist and flavorful.
  • A Latin inspired, chili powder and cumin with garlic

Using a wood fire:

Depending on the types of wood you use, can determine the heat of the fire and how long it will last.  Hard wood like Oak, will burn slower and longer.  Pine will burn fast and hot.  I prefer to use fruit tree wood or cedar due to its aromatic influences.  Wood fires are very different the standard BBQ or stove/oven cooking.  I strongly encourage you to try wood fire cooking if you haven’t already.  Please make sure you use safe precautions including having a bucket of water or a hose ready in case the fire gets out of control.

I hope all of my readers have a safe Memorial Day.

The Hearty Pasty

Pasties have always been one of my guilty pleasures.  It’s flaky crust and hearty insides can make any cold day bright and happy.  Whether the you follow the traditional Cornish (southern tip of England) recipe or the Americanized version made in the Upper Peninsula  (UP) of Michigan, this dish was the original sandwich and researchers in Devon, England have been able to trace references to this delightful dish to the 16th century.

The hearty pasty.
The hearty pasty.

The pasty was developed to help feed the Cornish tin miners who were unable to return to the surface to eat their lunch.  Covered head to toe in dirt, the miners, and later farmers, were able to eat their lunch and discard their now dirty crust “wrapper” to appease the mischievous fey in the mines including leprechauns and brownies.  Today, other variations can be found that include chicken, ham, pork and apples, and vegetables.

Cornish miners, who migrated to America, brought over their family recipes and influenced other cultures in creating their own version of the pasty including the Finnish copper miners of Michigan and the Mexican silver miners of Hidalgo.  Both ethnic groups created their own versions of the Cornish recipe and are available for purchase in various markets in their respected regions.

Cornish Pasties
Pastry Crust Ingredients:
4 cups of flour
1/2 tsp of salt
1 tsp baking powder
2 sticks of butter (softened)  (do not use olive oil or margarine as the crust will be hard instead of flaky)
1 egg
a bit of water

Pasty Filling Ingredients:
1 lb. round or chuck steak (diced)
4 medium red potatoes (sliced thin)
1 large onion, sliced thin
1 medium turnip, peeled and sliced thin
3 medium carrots, sliced thin
1/2 stick of butter
pinch of rosemary
pinch of thyme
3 cloves minced garlic, minced
Salt
Pepper

For the Crust:
Sift together dry ingredients and blend with softened butter.  Combine egg with enough water to make 1 cup and add to mixture.  Mix lightly and divide into 4 parts.  Roll each part to a 10-inch dinner plate size, using a plate as a template, cut a circle out, and lightly flour the surface.  Any scrap crust can be used to make additional crusts or be added as decoration to the pasties being made.

For the filling:
Divide the filling ingredients into four parts.  Place one of the divided parts of the filling on the one half of the crust round.  Sprinkle the filling with herbs and spices and add one-tablespoon butter.  Fold the pastry in half and seal by brushing melted butter on edges before pressing together and brush top of pastry with butter and pierce top of pastry.  I like doing a braided twist on the crust, which adds a nice touch to the pasty.  Begin at one of the corners of the half circle, lift and fold over by 45 degrees, pick up the new crust point that has been formed and fold that over 45 degrees.  Continue until the pasties are completed.  The folding over process creates a braided appearance to the crust.  Using a knife, slice three small cuts in the top of the crust to let the steam out.

Bake at 350 degree for approx. 1 hour or until golden brown.
Serves 8

Variations:
By following the crust recipe, you can make a vegetarian version-using root vegetables:  potatoes, sweet potatoes, turnips, parsnips, and beets.   Which provides a very colorful presentation and dish.

Black Bean Burger Recipes for my Gluten Free & Vegan Friends

I was recently at a barbecue party this past weekend with friends.  The typical choices were there – hamburgers, hot dogs, and veggie burgers.  But, some of my friends who were vegetarian (no meat) and gluten free were out of luck.

The veggie burgers had gluten added.  I suggested one of my black bean “burger” recipes and many asked that I post it here.  The first recipe is not a vegan dish as egg, sour cream, and cheese are added.  A vegan friendly recipe is posted as a second recipe below.

Ingredients

  • 1 (15 ounce) can black beans, rinsed and drained
  • 1 cup cooked brown rice
  • 1 small onion, finely chopped
  • 1 egg, lightly beaten
  • 6 tablespoons salsa, divided
  • 1/4 cup reduced-fat sour cream
  • 4 lettuce leaves
  • 4 slices reduced-fat Cheddar cheese
  • 4 gluten -free hamburger buns, split

Directions

In a large bowl, mash beans with a fork. Add the rice, onion, egg and 2 tablespoons salsa; mix well. Drop by 1/2 cupfuls into a large nonstick skillet coated with nonstick cooking spray. Flatten to 1/2-in. thickness. Cook over medium heat for 4-5 minutes on each side or until firm and browned.If grilling, spray some oil on to tin foil so that the burgers don’t stick to the grill and fall apart.

In a small bowl, combine sour cream and remaining salsa. Place a lettuce leaf, burger, sour cream mixture and slice of cheese on bun.

NOTE: When I make this for myself, I leave out the salsa and sour cream and eat with the lettuce leaves.

For my Vegan fans
This makes 6 medium-sized burgers:1 can black beans (about 16 ounces), drained and rinsed
1 cup cooked brown rice
1/4 cup onion, chopped
1/4 tsp cumin
1 tsp chili powder of choice
2 tbsp ground flax seed
(1 tbsp. corn starch, optional)Start by sauteing the onion in a tablespoon of water, just until they start to soften. Mash the black beans and add the peppers and onions and the other ingredients; mix well.Spray or brush a non-stick skillet with oil, and heat. Spoon the bean mixture into the hot skillet, forming patties. It’s best to do this by dropping spoonfuls into the skillet and using the back of the spoon to shape; they don’t do well if you try to form them into patties beforehand. Cook until well-browned on each side, turning once.  If you use a barbecue grill, place tin foil on the grill and spray some oil on the foil.  Cook the burgers on top of that.  It keeps them vegan safe and helps prevent them from falling apart.A note about the cornstarch: The cornstarch helps the burgers stick together, but if you use it, be sure you cook them thoroughly or you may taste the corn starch.