
During the Renaissance, bakeries were considered the epicenter of many larger towns. The townsfolk would buy their breads on a daily basis and they could catch up on the news and gossip of the town at the bakery. Unlike our modern bakeries with electrical or gas ovens, the bakers’ ovens were usually heated with wood or peat and were often built into the bakery’s architecture.
This past year, I became very familiar with the art of wood-fired baking. I had recently acquired a wood-burning oven to practice my baking skills. The oven provided some fairly accurate experiences of working in a bakery during the Renaissance. Each morning, I would heat the oven with birch and oak wood and would gradually warm up the oven. Once the oven was hot enough, I had the option of pushing back the hot coals to keep the heat longer or rake them out to cool the oven faster and then bake directly on the oven’s stone hearth.
There were many challenges in baking with traditional methods. From our modern perspective, the largest challenge Renaissance era bakers faced were the lack of prepackaged yeast. Bakers would have to create yeast naturally or find another baker to purchase or acquire live yeast. The live yeast was also known as wild yeast and grows naturally nearly everywhere, but it takes about a week to develop.
With patience wild yeast can be grown at home, but it takes a time. Below is one of my traditional methods of growing wild yeast.
Recipe for Wild Yeast
Combine 1/2 cup unflavored yogurt and two tablespoons of flour in a clean bowl. Cover with a cloth and let it rest for 24 hours.
Remove any liquid that develops over the yeast. Add two tablespoons flour and two tablespoons of water and stir every morning for a week. Make sure that you are removing any extra liquid before adding more flour and water to the mixture.
If too much starter grows, throw away half and replace it with an equal volume of the flour and water mixture. If bubbles develop, begin feeding the yeast every six hours with the flour and water mixture. Continue to pour off any water. Feed the yeast with the flour and water mixture about an hour before you plan to use in a recipe.
A Traditional Bread Recipe
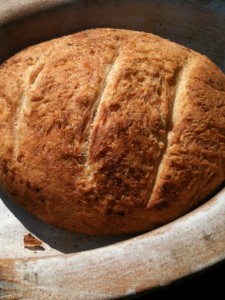
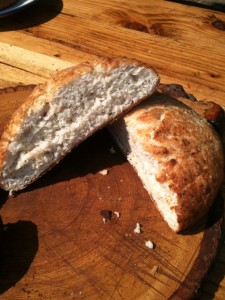
Now the yeast that is grown would be traded or sold to other bakers. It can be messy and time consuming and the ease and the availability of dry yeast allow for tasty, and yet fairly easy bread recipes. The recipe below is for rustic peasant bread and has been tested and written for modern ovens and equipment
Rustic Peasant Bread
1 package dry yeast
2 cups warm (not hot) water
1 tablespoon sugar
(honey was used during the Renaissance, but it doesn’t rise as much as using sugar)
2 teaspoons salt
4 cups flour
Cornmeal
Melted butter
Place yeast, water, and sugar in a bowl and stir until dissolved. The sugar will help feed the yeast and help the process along.
Blend the flour and salt together. Add the liquid yeast to the dry ingredients and stir until well blended. Do not knead.
Cover with a warm damp cloth and let it rise until double its original size (approximately 1 hour).
Remove the dough from the bowl, divide it, and place in 2 rounds on a greased cookie sheet sprinkled with cornmeal; the cornmeal will help stop the bread from sticking to the pan. Let the dough rise an additional hour.
Brush top on dough with melted butter and bake at 425 degrees for 10 minutes. Reduce oven temperature to 375 degrees and cook for an additional 15 minutes.
Serve warm.
Thank you for your research and post
I am helping my son research renaissance baking as his seventh grade class is creating a renaissance fair to raise money for their eighth grade trip. He wants to have a bakers booth. Do you have baker costume ideas? We are planning on building a mock wood oven. Do you know if they used brick in renaissance Italy?